

How To Break In A New Rope
How to Break in a New Rope
Introduction:
Ropes are essential for many things, including climbing and sailing. They're also instrumental in emergencies, like tying downwards a tarp or lashing together pieces of wood. Just ropes are oftentimes forgotten about until they break or get dirty. That's why it's essential to know how to brand them last as long as possible! Climbing ropes come up in two primary varieties, dynamic and static.

Dynamic rope is designed to absorb the shock of a autumn, while static string has a minimal stretch to provide piece of cake clipping. Double ropes are slightly thinner than single ropes, giving them greater flexibility while placing small-scale wear on protection placed along the road. In this article, I will take a detailed discussion on how to break in a new rope. SO let the states get started.
A Detailed Stepwise Guide on How to Break in a New Rope:
Choose a Rope and Make Sure Information technology's the Right One for You lot.
The following instructions were created assuming that you have chosen a rope made from quality materials, which is designed explicitly as climbing equipment–not a random piece of nylon material lying effectually at home. A climbing rope can be distinguished from other strings past several things: information technology has a core and an outer sheath; it is solid (rated in UIAA falls, usually between v-eight); and has a dynamic or low elongation rating (usually under 4%, though this number varies with bore).
While many people climb on ropes also curt for their peak, some full general guidelines to follow when determining what length of string would work best for you. A good size to beginning with reaches twenty-25% of your acme (for instance, if you are 6 feet tall, expect for a rope between 3 and 4 meters). And finally, make sure it's the right weight–rope weights are designated by diameter in millimeters. The general dominion is that lighter ropes allow for more than condom but restrict movement over technical terrain. In dissimilarity, heavier ones require more excellent skill only provide better protection on big falls.
When choosing a length, keep in mind that longer ropes might be more piece of work to agree onto because there is more than weight to elevator every bit you move around. If yous're wondering what size rope y'all should purchase and so that information technology'll be long plenty without being too heavy, a good option is to look for a middleweight rope that's between 9.iv and x millimeters in bore.
Pace 1: Inspection
Before using the new rope, check it for any signs of damage—cuts, tears, pulls, frays, etc.—which may have occurred during manufacturing or aircraft. If there are any issues with the sheath itself (it'south torn or flapping), the entire sheath should exist removed from the core by cutting forth one side of the damaged area and peeling the sheath back. The sheath can then be tied to your harness with a quickdraw or carabiner then that it doesn't arrive your way when climbing.
In one case you have taken care of whatever possible problems, the rope should be thoroughly inspected for knots, tangles, missed strands, and other irregularities. On this same note, bank check the ends of the rope—rope manufacturers sometimes cut corners by leaving less material at each end of the scroll (increasing profit margins). If you lot notice at that place'southward not as much rope on either end, use a lighter to cook the cobweb slightly so that they are even.
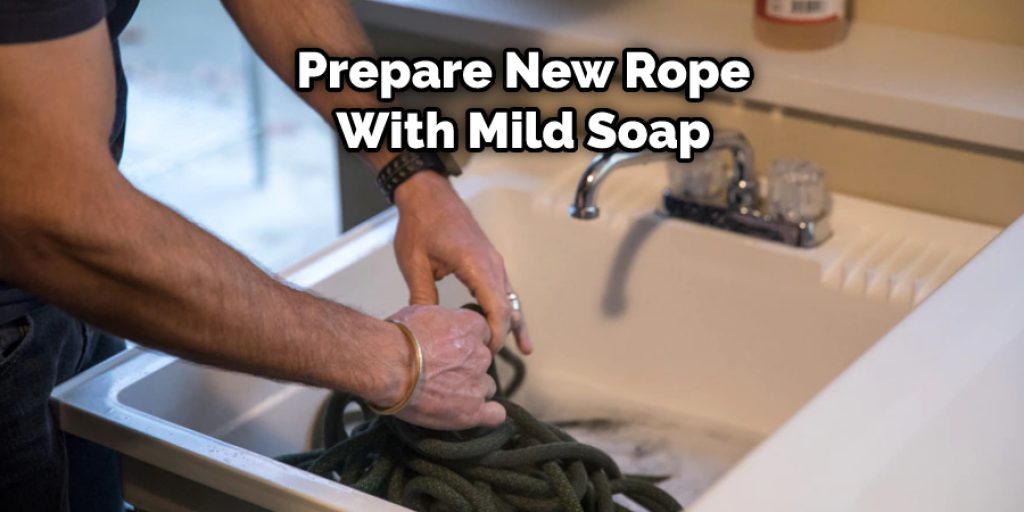
Stride 2: Cleaning
To fix your new rope for its start use, it is in absurd water with mild lather for at least 30 minutes. This volition help rid the sheath of any dirt or debris that may have come into contact during manufacturing, storage, or shipping. Make sure to remove all soap residues before using the rope since they tin can damage the fibers over fourth dimension.
Step three: Drying
After cleaning your new rope in cool water with mild lather, information technology should exist hung up somewhere where information technology won't get snagged on annihilation and allowed to baste dry for at to the lowest degree four hours. Please don't exercise this inside your home because you run the chance of dropping a wet climbing rope on furniture or accidentally leaving it out where pets might chew through information technology. Instead, subsequently iv hours have passed, movement the rope exterior and drape it over something like a balcony railing where it can continue to dry abroad from the elements.
Footstep 4: Coiling
The next footstep is crucial—coiling your new rope into a keen niggling package that stays out of the way when climbing and won't tangle, twist, or knot upon y'all. In that location are many dissimilar means to coil a rope. Withal, this method has worked well for me in the past: start with an arm's length of rope (about i meter), hold 1 cease in your fist, make three wraps around your wrist with the residual of the rope, and finally secure it by tying a figure-eight follow-through knot at least two inches higher up your wrist.
This should leave yous with near xxx centimeters of tail extending across the knot. Now tie a loop—either by tying another figure eight or simply doubling upwards the rope—just large enough to fit your closed fist inside. Coil this loop effectually your fist three times until y'all have roughly 30 centimeters of tail on either side of your paw, so tie another knot (an overhand is OK) at least two inches to a higher place the coil to secure information technology in identify.
In one case you're finished, constrict any extra slack into the final loop and tap it down with your palm. Yous should now have an evenly coiled rope with no twists that sit comfortably on your arm when hung from your shoulder sling.
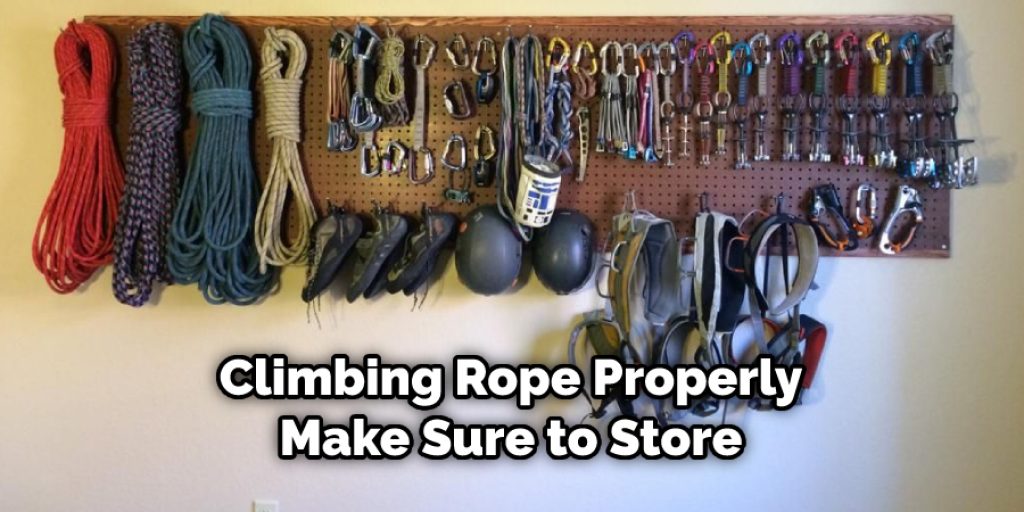
Footstep 5: Storing
Now that you've learned how to break in a new climbing rope properly make sure to store it out of the elements when it'southward not in utilise. The cables will corrode if left out in the rain, while sunlight can weaken the sheath over time. I like to hang mine upwardly on a tool rack (y'all know, ane of those orange things that hold all your climbing gear) indoors, simply you could also curl it into a large brawl and stash information technology under the bed or closet.
Step 6: Maintenance
Once you've called where to store your rope for months or even years at a time, call up to check its status every at present and again (at least one time every three months). Look for any fraying or cuts—big or small—that may take occurred since the last inspection; if y'all discover anything serious, cut off the damaged department and run the residual through the quickdraws or lower information technology downwards with some webbing.
Conclusion:
I hope you take obtained a articulate conception of how to break in a new rope. Cheers and have a nice day!
Source: https://diyquickly.com/how-to-break-in-a-new-rope/
0 Response to "How To Break In A New Rope"
Post a Comment